Dealing With Light in Photography
It goes without saying that without light, photography is not possible. But, in order to be able to succeed in taking eye-catching photographs, you need to think of how the light’s strength, quality and color temperature affect the final result you will get. While the strength of the light determines the shutter speed and aperture you will be using, its quality (hard or soft) will affect the general atmosphere of the photo, and its color temperature will determine how the colors are perceived in a particular shot.
When dealing with natural light, you should be aware of its different characteristics and the ways in which you can control it. Only then, you will get the photos that you want in any situation and at any time of the day.
Natural Light
The Different Types of Natural Light:
Natural light isn’t constant and keeps changing at different times of the day. Factors such as the level of the sun, the presence of clouds and pollution affect natural light in matters of strength, quality and color temperature. Thus, depending on the time of the day in which you are shooting, the weather and the position of your subject in relation with light source, you can get totally different images of a same scene.
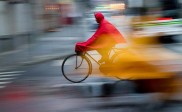
Early Morning/ Late Afternoon:
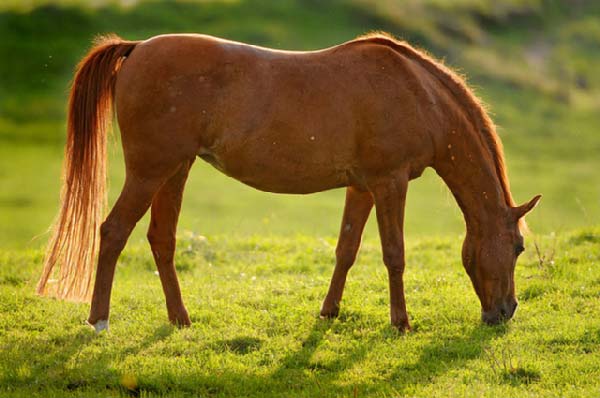
Photo by Tambako the Jaguar
The light at these times of the day is softer than at any other moment and the color temperatures are warmer (color temperatures tend to be cold and bluish at dawn, though). There is nothing like this kind of light to take some outdoor portraits. As the sun is at low position around these moments, try to place your subject either facing the sun or at a 45° angle to get interesting results. But, don’t forget to pay close attention to the shadows and how they act in different positions.
Midday:
Color temperature is usually neutral at this time of the day, but, as the sun is really high in the sky, there is little to no shadow at all which makes photos taken around midday flat and dull. Portraits taken around this time aren’t usually interesting. The light is harsh and a shadow will be cast under the nose which can be unflattering and can also hide the lips of the person you are shooting. Unless, you are using something to reflect or diffuse the light, it’s wise to avoid shooting portraits at midday.
Backlight:
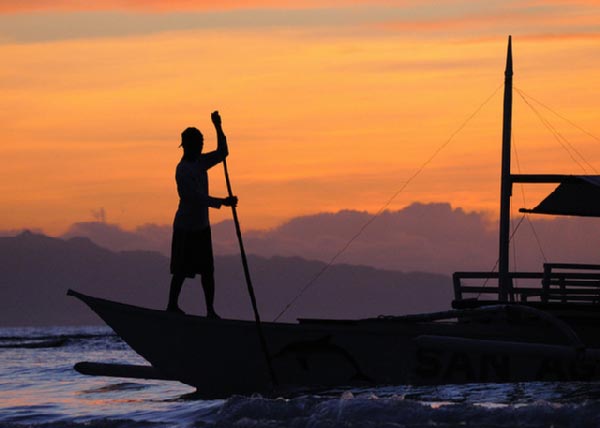
Photo by lovefool416
Placing your subject between your camera and the light source can produce some interesting silhouettes. To avoid this kind of effect, you can simply change your subjects position or try to cast some light on your subject from the front.
Controlling Natural Light:
In any of the above situations it is possible to control and alter the way in which natural light acts, in order to achieve the photos as you want them. There are some simple techniques that can be really efficient in saving some photos to be ruined by the light conditions. The following techniques work best with photos of people and portraits.
-Reflectors:
In order to get rid of unpleasant shadows that can appear if you are taking shots around midday or if you want to avoid getting a silhouette when photographing in a backlit situation you can use a reflective surface to direct some light to the shadow areas. It can be a proper photo reflector or you can use a white sheet or some aluminum foil. The same result can be achieved by simply popping up you camera flash to use is as fill in light along with the natural light.
-Diffusing the light:
Another option that can help soften the light hitting your subject is to diffuse it. You can use a white muslin cloth fixed on a wooden frame. This will evenly distribute the light on your subject resulting in an image with homogeneous lighting and no hard shadows.
-Blocking the light:
Use a black cardboard to block the light, and you can get great soft lighting on your subject reflected from the environment around it. This technique is especially useful when photographing people. The sunlight can be so strong sometimes, resulting in the models not being able to keep their eyes wide open.
Artificial light
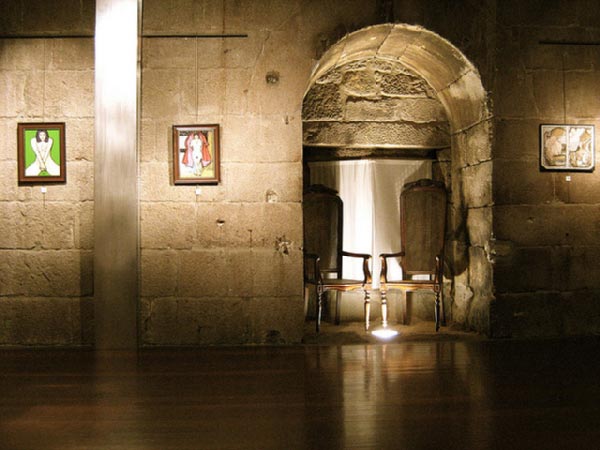
Photo by stukinha
You should deal with artificial light in the main manner in which you deal with natural light. It produces different effects depending on its strength, quality (hard or soft) and color temperature. The only difference is that with artificial light, it is crucial to control white balance because of the variety of color temperatures of different lights. Also, artificial light gives you more freedom to place it where you want it to be and to control it more easily through reflectors, diffusers and other light modifiers.
White Balance:
Artificial lights come at varied color temperatures. The most common types of lights are:
– Candlelight: 1000-2000 k
– Tungsten Bulb: 2500-3500 k
– Fluorescent Lamps: 4000-5000 k
It is important that you adjust your white balance before shooting in artificial light. In many occasions you will find yourself dealing with different color temperatures in the same setting which will be hard for the camera’s auto white balance feature to deal with. Most cameras have several white balance adjustments from which you can choose the most suitable for the type of lighting you are using. In some cameras, you can set the exact color temperature value in Kelvin. You may also want to consider shooting in raw, as it will give you more control over white balance adjustment in post processing.
Light position:
You must learn how to position your light and your subject in relation to each other in order to draw the eye to what you want the viewer to look at. There several settings for positioning artificial light in a studio environment. You can place the light a bit higher than you subject and 45 degrees off to the side. This is the standard light setting for many situations. You can also use a lateral lighting b placing the light source totally to the side of your subject to create some interesting shadows and to give more contrast and a dramatic effect to the photo.
Try combining different lights to get the best results .Also, as with natural lighting, light modifiers can be used with artificial light to soften and direct it.
About Author
Yassine Hakimi
Yassine Hakimi is a self taught Tunisian amateur photographer. He caught the photography virus back in 2006 and has been shooting and learning non-stop ever since.Feel free to visit his profile
