Depth of Field in Photography
You probably remember seeing photographs where a close subject is very clear and sharp (in focus) while the rest of the background is very blurry (out of focus). Or, photographs where both the close subject, let’s say a flower, and the background which can be some far trees, are clear in the image and in focus. This is happening because of the depth of field. Understanding how the depth of field works in photography is a very important aspect of making good photographs. Controlling the depth of field can help you shoot photographs where your chosen subjects are always clear in the picture, or it can help you achieve an interesting effect by selecting which elements from your photo should remain clear and which blurry.
But what exactly is the depth of field in photography?
The term, depth of field (DOF) refers to an area within a scene that appears sharp (in focus) in the image. This area is located both in front of the subject and behind it. More easily to understand, the depth of field is the area between the nearest and farthest object that appears in an acceptable sharp focus, in a photo. Although lenses can focus precisely at only one distance, the decrease in sharpness is gradual in front of the focused area and behind it. But, it’s imperceptible within this area of the depth of field. That’s why any subject located within the depth of field would appear to be in sharp focus.
There are a few factors that affect the depth of field, such as the aperture, the subject’s distance, the focal length and the film or sensor format of the camera. Depending on the situation you might want a photograph where the whole image is sharp, or just a part of it, while the rest will remain in blur. Learning to control the depth of field will enable you to choose how the image will be recorded on the camera, in terms of sharpness.
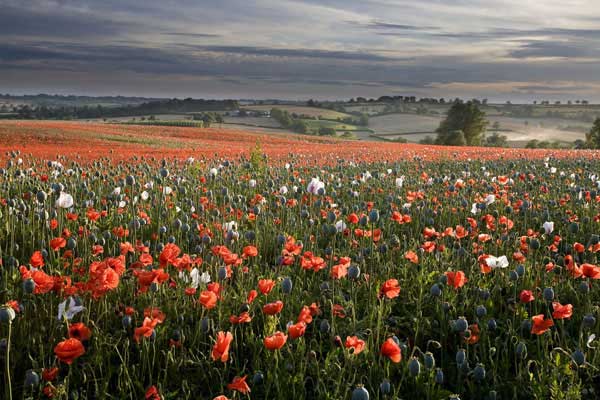
Photo by Monosolo
How is the depth of field being calculated?
There are a few complicated formulas, but you don’t need to know all the details, just how to take advantage of the depth of field and how to control it. If you are curious, there are a few websites that have online calculators that will tell you according to your camera’s settings and the subject’s distance, what is the total
depth of field (http://www.dofmaster.com/dofjs.html). To have a better understanding of the depth of field, you should know the different terms that relate to it:
– Near limit of acceptable sharpness: It is the point from which the image starts to look sharp. You can refer to it as the beginning of the depth of field area. It is located in front of your focused subject.
– Far limit of acceptable sharpness: It is the point where the sharpness of the image ends. You can say it is the end of the depth of field area. It is located behind your subject.
– Total depth of field. It is the total area of the depth of field and it is located between the point of the near limit and the point of the far limit of acceptable sharpness. You can subtract the distance to the near limit from the distance to the far limit, to find out the total depth of field.
– Hyperfocal distance: There are situations when focusing to a certain distance will extend the depth of field to infinity, which means the far limit of acceptable sharpness is infinite. The hyperfocal distance is the nearest focus distance from which the depth of field extends to infinity. If you are focusing the camera at the hyperfocal distance the result will be the largest possible depth of field for a given f number. Since the depth of field extends to infinity, if you’re focusing beyond the hyperfocal distance the result will be a smaller depth of field in your image, because the near limit of acceptable sharpness will be closer to the subject (so in this case, further from you), and the total depth of field will decrease.
– Circle of confusion: Although there isn’t an exact point where the depth of field changes from sharp to blur, because there is a certain transition, the circle of confusion is used as a term to define the point where blur becomes perceptible to our eyes, in a photograph. The value of the circle of confusion corresponds to the diameter of the blur spot on a camera’s film or sensor. This is only a tiny spot on the camera’s sensor and it is said to be located just outside the depth of field area, where it is no longer “acceptably sharp”.
How do you control the depth of field?
As we know, the depth of field is affected by the aperture, the focal length, the distance to the subject and by the camera’s sensor (using a camera with a crop factor, such as 1.5X for Nikon entry level DSLRs or Canon’s 1.6X for their entry level DSLRs will give you a depth of field different from the one produced by a camera with a full frame sensor). As you might have situations where the distance to the subject may be difficult to change and you also want to keep the focal length and since you can’t change the camera’s sensor (only the camera), the easiest thing you can change when taking a photograph is the aperture.
The aperture’s diameter, referred to as the f-number can be easily controlled, and by the variation of the f-number you can control the depth of field. A large aperture, which translates into a small f-number (such as f/1.8) produces a shallow depth of field, while a small aperture, with a larger f-number (such as f/22) produces a greater depth of field. This means that a photograph taken with a small aperture, such as f/22 will have most of the image in focus, while a photograph taken with a large aperture, like f/1.8 will probably have only the main subject in focus while the rest will be blurry because of the shallower depth of field.
Having the rest of the image in blur is a desired effect for many situations in photography, as it helps emphasize the main subject by blurring the other distracting elements in an image.
For example, using a calculator we can find out that for a camera with a crop sensor of 1.5X such as the most popular DSLR from Nikon, the D90, using the focal length of 50mm and focusing on a subject located at a distance of 10 meters, we will have the following amounts of depth of field:
– for an aperture of f/1.8 the near limit of acceptable sharpness will be 8.76m (28.74ft), while the far limit will be 11.7m (38.39ft), thus meaning that the total depth of field will be 2.89m (9.48ft) (a shallow depth of field). This means that with this aperture almost everything, except the main focused subject, will be in blur.
– for an aperture of f/8, the near limit will be 6.11m (20.05ft), while the far limit will be 27.5m (90.22ft). The depth of field in this situation will be a total of 21.4m (70.21ft). The increase of the f-number, from 1.8 to 8 makes a big difference, as the depth of field is now a lot larger than in the previous situation. This can drastically change a picture, where everything else remains the same. Now, more elements from the picture will be in focus, so the main subject won’t be isolated any more.
– For an aperture of f/22 the near limit will be just 3.57m (11.71ft), while the far limit will move to infinity. This means that the depth of field will actually be infinite. In a situation like this everything behind the near limit will be in focus. This is great for landscapes in general, where you’ll want to keep a sharp image for all the elements in your photograph.
To blur or not to blur?
When you take photographs you’ll usually want to have a clear and sharp image. Usually, the lower the aperture number is, the clearer the image will be, as more light will enter in the camera thanks to the wider opening of the aperture. This will also make the depth of field smaller which means that only the main subject will probably remain in focus. Many photographers use this as an artistic effect, by intentionally blurring the background to create a so called “bokeh” effect which makes the pictures taken from a close range very interesting. This is especially useful for portraits, because it will emphasize the person in the image, while the background will be somehow masked, as it will remain blurry.
Adversely, with a small aperture you can make the depth of field larger and this is useful if you want to capture more than one subject in focus. Let’s say you want to take a picture of a flower field, with some beautiful mountains in the background. Using a small aperture (a high f-number) will increase the depth of field up to infinity, which means the field of flowers as well as the mountains will be in focus.
Using the same technique with a wide aperture, you can make the background in focus and the closer subject to you, blurry, if you focus on a subject that is farther in the image.
Controlling the depth of field can give you more opportunities when composing an image, and choosing one technique over another is an artistic choice that you should make considering what is more suitable for every situation. You should experiment controlling the depth of field as this is a great way to make your photographs look more interesting and artistic.
Below are some examples of how a good control of the depth of field can help you achieve great photographs.
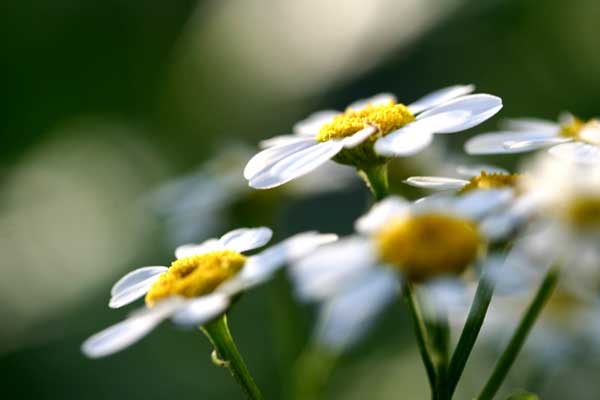
Photo by rapidvision
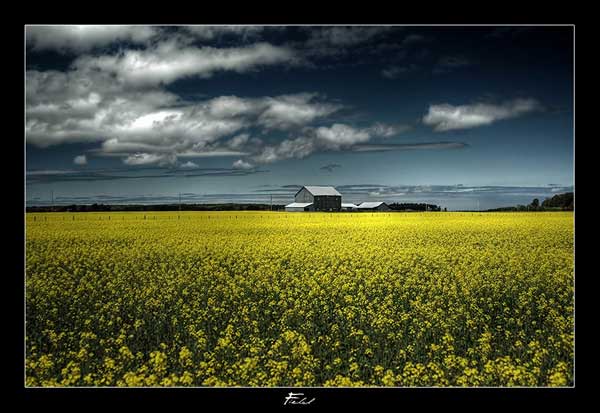
Photo by BrightRedFox
Photo by marcela_chifu
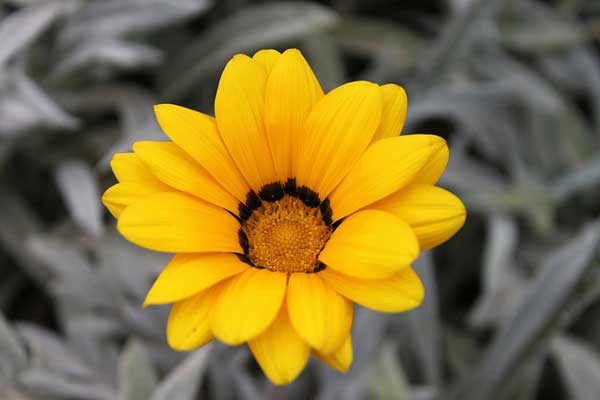
Photo by Radwasamir

Photo by cdreek
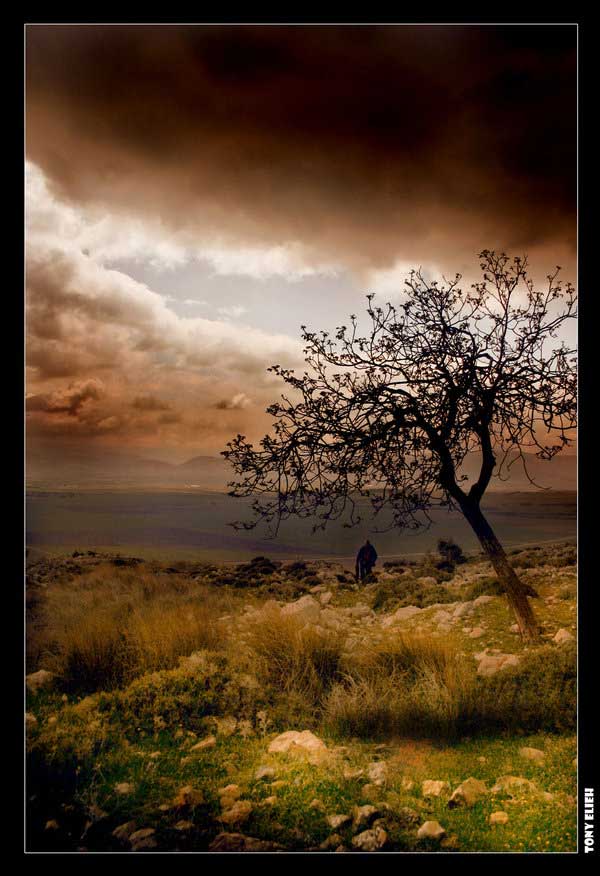
Photo by tonyelieh

Photo by lilbluegill89

Photo by P1NKM374L5LU7
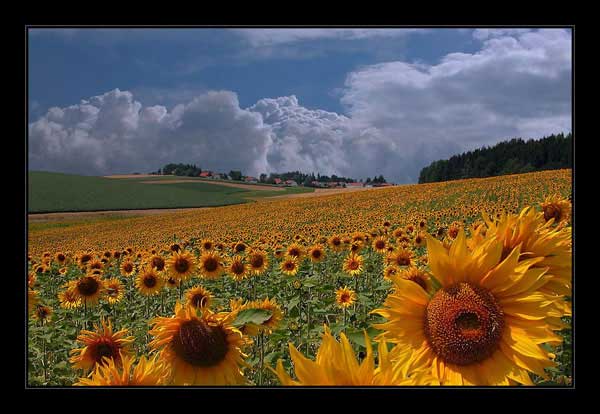
Photo by Hartmut-Lerch
About Author
Valentin Gavan
Valentin Gavan is a self-taught photographer who is passionate about photography. He also does concert photography for an online metal magazine. You can see some of his works via his profile


Cool website. Thanks for always posting such usefull stuff!