How to photograph ink drops in water
Unique, impossible to recreate and infinitely creative; ink drop photography is a beautifully engaging art. And what’s more, it’s surprisingly easy to do yourself.
Shopping list
You really don’t need a great deal of equipment to get going with ink drop photography. As with any specialist technique you can spend a fortune on a flashy kit, but before you lay out hundreds of pounds on macro lenses why not take a trial run first? You’ll need:
– a selection of different coloured inks
– a medicine dropper or pipette
– a fish tank or a large glass container
– a large piece of white paper or a soft box
– a strong light
– a camera with manual focus
– manually operated flash.

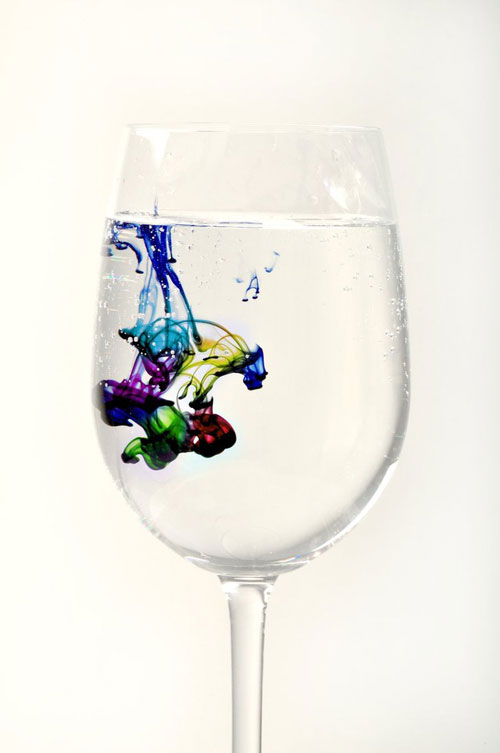
Redbackspider
Step one
You need to make sure that your fish tank is absolutely spotless; stains can cause unwanted reflections. Next fill the tank with water and position your camera on the tripod in front of it. Put your light into position and switch it on. Look through the viewfinder to check for any reflections. If you spot them you’ll need to give your tank another once over in the wash. It may feel like hassle now, but it’s much quicker to do this than to comp out water spots and dirt later.
Step two
At this point take the white paper and cover three sides of the tank completely. Alternatively, you can also place your fish tank in front of a white wall. This approach means you’ll need to spend more time on test shots in order to work out the angle to position your flash to ensure that the light reflects back from the wall, through the fish tank to the lens. It’s easier and more time efficient to use paper when you’re starting out.
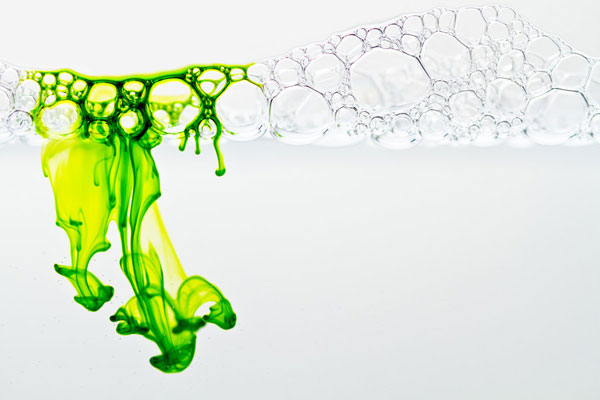
Lau-sig
Step three
Fill your fish tank with cold water. This will make the ink travel more slowly and extend the time it takes to fall to the bottom of the tank. The slower the ink travels, the more time you have to snap – it will also help reduce your ink usage.
Step four
Change your camera to manual mode. You will need to set your camera to a wide aperture in order to control the amount of light the lens allows to strike the sensor. Set your shutter to bulb mode and select the lowest possible ISO.
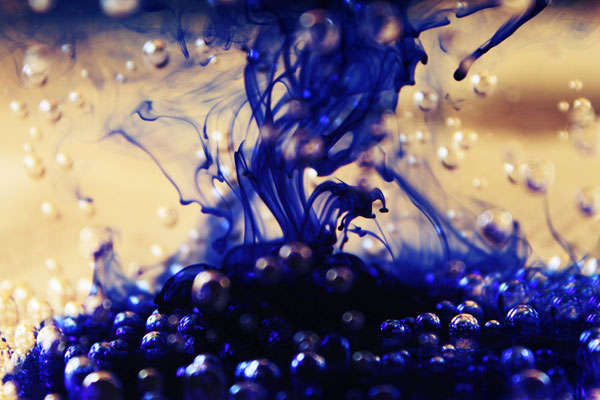
Jvrichardson
Step five
It helps to have another person working with you; one person to control the ink droplets and trigger the camera and another to operate the flash manually. If you’re working alone you are going to need a remote control to operate your camera.
Step six
Drop a small amount of ink into the middle of the tank and open the camera shutter. As soon as the shutter opens fire the manual flash. Once the flash has fired release the shutter cable to close the camera shutter. Once you’ve got your technique nailed you can take shots in rapid succession. The process is simple and goes as follows:
– trigger the shutter
– fire the flash
– close the shutter
– open the shutter
– fire the flash
– close the shutter
– repeat.
Against All0dds
Step seven; practice makes perfect
– You could try experimenting with different shades of ink and varying the amount you drop into the water.
– Don’t just throw away the water in the tank after a few attempts. It may look black but if you up your flash power, stir the water and snap away you’ll be surprised at the possible results.
– Try adding a few drops of milk to your ink to make your colours even more vibrant.
– Your shutter release cable might not be long enough for you to be able to squirt, flash and snap. You will probably need a wireless shutter cable.
– If you’re working as a team it takes time and practice to establish a good working rhythm.
About Author
Claire Roper
Claire works in marketing for Printerpix Reviews. She has a passion for photography and travelling. Follow Printerpix on Twitter.


