Night Photography – Between Dusk and Dawn
With everyone working long hours these days and no time to pursue their photography interests, we see more and more people getting enamored with night photography. Night photography requires you to possess a greater understanding of the depth of colors offered by it and an even greater imagination! Whether you have a compact point and shoot or a powerful DSLR, both have a shutter speed range that possesses the ability to take stunning low-light pictures. The technological advancements in the areas of high-speed films, wide-aperture lenses, increased sensitivity digital image sensors and the even grander power of urban lights are the prominent reasons that have made night photography increasingly popular and possible using available light!
With the help of the following tips and simple techniques, everyone can be successful in pursuing night photography and getting spectacular results. They are :
It is essential that you hold your camera absolutely still and stop it from automatically firing it’s built in flash. This is impossible to achieve without making use of a support such as a tripod, plus clamps or grips. Making use of a tripod will offer greater flexibility as long exposure times are needed to get the exact angles. This helps to take low-light photos with minimal noise or blurring.
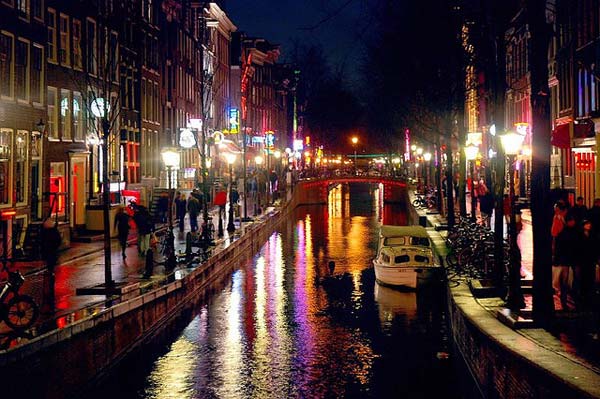
Marcel Germain
Another important factor that determines the quality of your night photo shot is the exposure. Always keep your camera in a manual mode and use long exposures and long shutter speed in order to reduce noise. Using long exposures involves utilizing a mobile flash unit to clearly expose the various parts or the interior of a spotlit building. This technique helps to illuminate the various colors and create shadows in different ways which would otherwise not be possible. It also helps to capture motions and actions clearly without any blurring.
Similarly, shutter speeds also have a huge impact on the output of night photography. Night photography usually involves focussing on a large expanse of area which has certain spots of illumination such as fireworks, moonlit trees, neon signs or spotlit buildings. In such cases it is important to keep the camera in a manual mode and continuously adjust the shutter speed until the exposure meter gets the right balance.
Usually in night photography if the white balance is not set correctly, the pictures tend to have colored tints due to different types of lighting at the scene. While capturing underground lighting, street lamps or the interiors of a home which usually have a tungsten lighting, it is important to change the white balance setting from auto to other white balances will result in better pictures and give a warm color to the photo.
Becoming technically sound in High Dynamic Range (HDR) and Dynamic Range Increase (DRI) is perhaps the most important suggestion to get better results from night photography. These techniques will help to blend images from several exposures to create a new higher dynamic range as opposed to any of the original exposures. There are several software such as Photomatix and Photoshop that feature numerous post processing techniques such as automatically setting photos in different exposures, manual masking, blending etc.., and making use of these will help to get spectacular results!
Just wait for the sun to go down, pick up your camera and few accessories, put on your creative face and that is all that you need to take awe inspiring low light pictures!
About Author
Keerthana Karthik
Keerthana Karthik is a blogger and photography enthusiast. She loves writing photography and photo restoration blogs. She at present blogs for wowApic, a photo editing services website that specializes in restoring photographs, editing, touch up, enhancement, pop art gifts, personalized photo gifts and more.
