Product Photography for the Novice
Product photography is the technique of photographing products in order to produce an image that is positive, attractive and easy to comprehend. It can either serve the purpose of stimulating the interest of potential buyers or simply illustrate a product in a concrete and straightforward way. Product photos appear to be quite simple and easy to achieve, but they require a great mastery of lighting, exposure and composition. Producing a product photo is a whole process, and this article will help you understand it and will provide you with the necessary knowledge needed to take your own product photos.
Getting Ready:
You need first to get familiar with the product you are photographing. Look at it from the point of view of someone who is going to buy it and try to figure out its strong and weak points. This process will help you in finding the best angle to take your photo from. Of course, you should also clean your subject very carefully and make sure you got rid of dust particles and of any fingerprints and stains. After studying your subject, you need now to decide which background will be adapted to the product and which one will help draw the eyes to it. A neutral background with a discreet color is your best option to put the emphasis on your product. The viewer wants to see the product you are selling and nothing else. Consider getting at least three different backgrounds: a gray background for general use and to avoid the interference with the colors of a product, a white background for dark objects and a black one for bright and shiny objects.
Composition and Framing:
Composing and framing in product photography are not about finding that unusual angle that would make the viewer wonder in front of the photo, but it’s rather about presenting the object in a neutral and clear aspect. Your photo will mainly be a showcase of the product to the potential buyer who needs to understand clearly and with ease the shape, size and color of the product. By placing yourself at the level of the object you are photographing you will avoid any kind of distortion and you will make it stand out more.
In order to present it in the most authentic way, it’s better to isolate the item you are shooting through framing it tightly and centering it in the composition. Also, try to take photos of the product in question from its different sides. This approach will give you an objective result which doesn’t emphasize one side of the product at the expense of the others. Finally, consider varying your shots, by taking some close-ups, some general shots and some details. That way, you will be able to cover the general aspect as well as other characteristics like textures and lines.
Lighting:
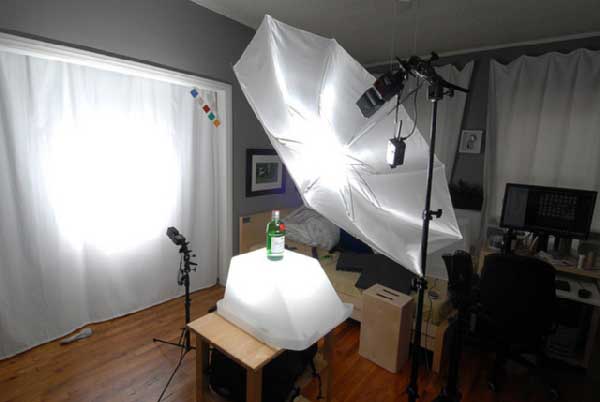
When lighting a product, think of the buyer who wants to see every bit of the object. Thus, you need a lighting that will cover all sides evenly and that will not produce shadow areas. You don’t need expensive lighting equipment to achieve great results, though. All you need is diffused light. You can simply use light coming through a window on an overcast day. You can set up your product near the window and you can use a white paper to reflect the light coming through that window on the shadowed parts of the product. But, if natural light is not an option, you can simply use two desk lamps diffused through a white cloth or paper or reflected on a wall. An important thing to consider, when working with artificial light, is to set your white balance properly in order to get a photo which is genuine and representative of the real colors of the product. At all costs, avoid mixing different types of lights and use only one type, to make it easier for you to set your white balance properly. You can set it through different white balance menus in the camera (tungsten, fluorescent, daylight…), or in some cameras, you can set the color temperature you need directly.
Special case:
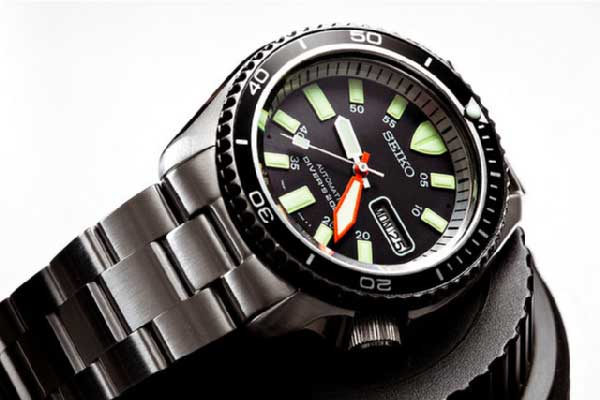
Lighting a shiny object: The above lighting set up can be somehow problematic in the case of a shiny or reflective object. The product will reflect the light which can produce some harsh highlights and reflection of the surrounding environment. To avoid this effect, you need to use a light tent that will isolate the object from the surrounding environment. You can get these at camera supplies stores (they don’t cost too much) or if you are low on budget, you can construct your own light tent with a carton box and some white translucent paper. All you have to do is to cut out the different sides of the box and to cover them afterwards with your diffusing material (a cloth or some translucent paper). Then, you can place your object inside the box and light it through the diffusing material. You will be surprised by the amazing results you can get from such a simple device.
Setting the camera:
You can use whatever camera you have to achieve good product photos. But, it goes without saying, that using a DSLR is better since it will give you more control over your final image.
-Focusing: It can be sometimes tricky to use autofocus, especially when photographing tiny objects. So, using manual focus will assure you to get what you need. Also, consider using a tripod to keep your camera at a fixed position, so that you don’t have to adjust your focusing all the time.
-Depth of field: You need a depth of field large enough to include the entire object you are photographing. For this purpose, it’s better to use really small apertures and to avoid using telephoto lenses.
-Distortion: In order to avoid any kind of distortions, avoid using wide lenses and getting really close to your subject. Opt for a 50 mm lens, as it will give you an image close to how we perceive the object in real life.
-Exposure: You need an image that is bright and filled with vivacity. So, it’s crucial that you expose it correctly, and overexposing a little bit can also be useful in this kind of photography, especially when photographing a white background. In fact, the camera meter will perceive the white background as too much light and will compensate for that by underexposing the shot. You need to overexpose the photo by one stop or two, to get a perfectly lit background.
Editing:
Editing is very important in product photography, as it will be the last step to make your photo look its best and serve its purpose perfectly. If you have taken your shot properly, you won’t need extensive editing. So, any basic editing program should be enough. You can easily improve your final result within few clicks of a mouse.
If you are using Photoshop, for instance:
First, you can work on the contrast of the image, by adjusting the curves or the levels which will give the image a nice contrast and will make it a bit sharper. Next, you can adjust the color balance, in case your image has a color tone that is dominant. You can easily correct that through the color balance tool in Photoshop. A last step (not always necessary) you can do is to improve the sharpness of the image through applying an unsharp mask.
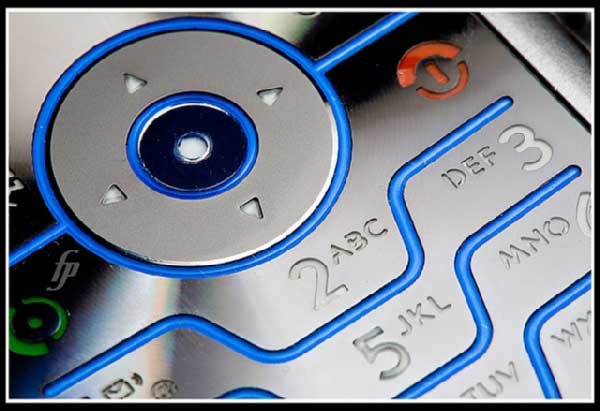
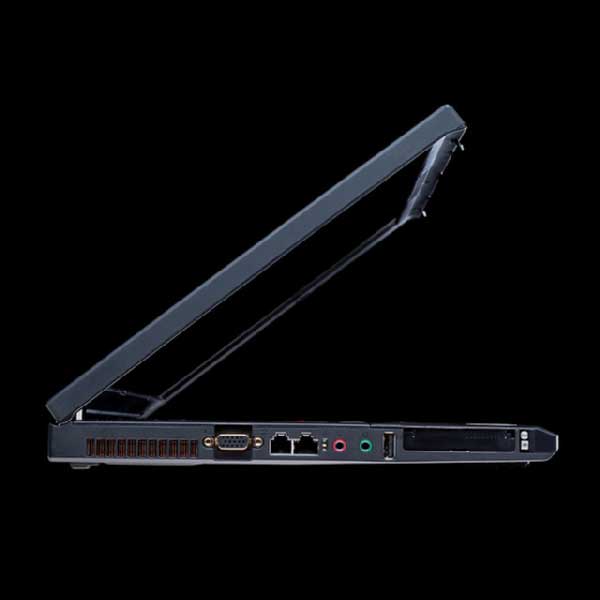
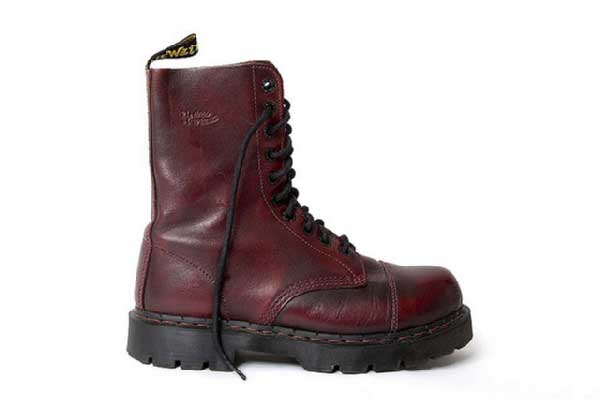
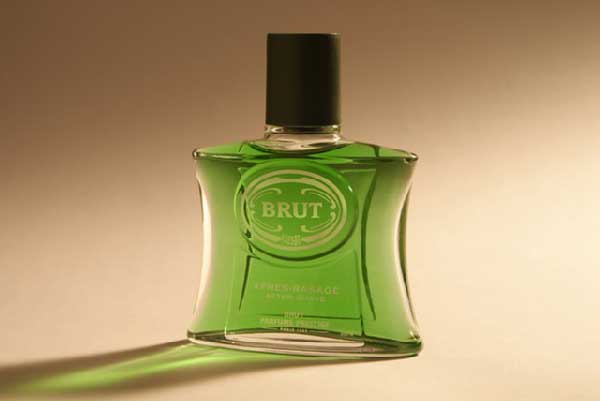
Some examples of product photography:

About Author
Yassine Hakimi
Yassine Hakimi is a self taught Tunisian amateur photographer. He caught the photography virus back in 2006 and has been shooting and learning non-stop ever since.Feel free to visit his profile


Thanks for the well composed tutorial. Great job!