Tips and Tricks for Insect Photography
Insects are all around us. With their nearly endless array of colors, body types, habits and habitats, they are a popular subject among photographers. With a few basic tips and tricks and the right equipment, you can take insect pictures worthy of magazines and art galleries. The trick is knowing exactly where to start.
Insect Photography Equipment Essentials
Insects are obviously much smaller than typical portrait subjects. When you are photographing something that is only a few millimeters long, a few adjustments are essential in order to get the most out of both the equipment you are shooting with and the available settings. While some point-and-shoot cameras are capable of taking respectable insect photos, a basic macro equipment setup will provide greater quality, contrast and clarity. Key items for any macro photography set include:
1. Camera with Full-Manual controls: Insect and macro photography are all about focus and depth of field. In most cases, these settings are so precise that automatic camera controls simply cannot keep up with them. Choosing a camera, such as an advanced point-and-shoot or digital SLR, will give you greater control over the consistency of the quality and more predictable results.
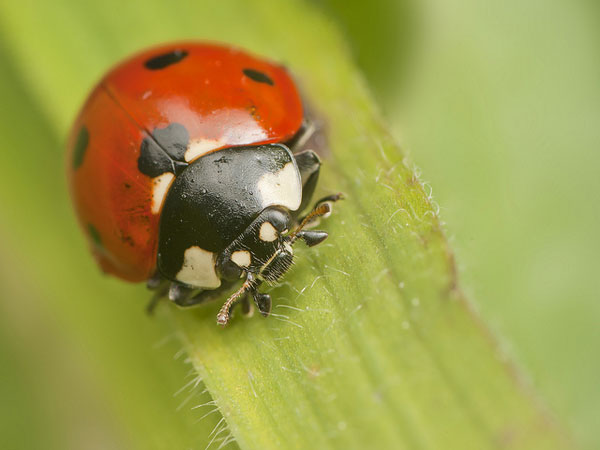
Anxo Resúa
2. Macro (1:1) Lens: A 90 or 100-millimeter lens is a good starting lens. This will often allow you to keep a safe distance from your subject while mastering your skills. While larger lenses, such as 150 or 180-millimeter lenses provide even greater distance, they are often substantially more expensive. These lenses are also heavier, which can make it difficult for beginners to hone their skills and find the perfect shot, due to the drift and shake which will naturally occur as arms and hands fatigue.
3. Monopod or Tripod: With the fast shutter speeds and low aperture settings required for insect photography, image stabilization is a must. Every movement you make can potentially scare away your subject and ruin your shot. Choose a tripod that is comfortable to transport and learn to use it in a quick and quiet manner. When dealing with extreme magnifications, even a slight breeze or your own breathing can make the difference between stunning results and a lackluster blur.
4. Flash: Whether it is the pop-up flash on your camera or an external or lens-attached flash, utilizing a powerful flash will add more flexibility to your photos while improving detail and contrast. You cannot control many of the aspects of insect photography. By adding a flash, you can exercise greater control over the shot and environment. Adding a flash also allows you to push your shutter timings and aperture sizes even further for improved results.
Making the Most of Your Insect Photography Shots
One of the most difficult aspects of insect photography is that bugs do not cooperate and tend to flee as you approach or just as you press the shutter button. This means that you must move slowly and deliberately, avoiding anything that draws attention to you. A popular saying amongst insect photographers is to “move slow and shoot fast,” similar to the approach taken when shooting large animals in the wild.
Bumping a stray branch with your lens or stirring up dust is all it takes to scare away your subjects. If you have trouble approaching the insects you wish to photograph, consider shooting your photos during the morning or late evening. Not only will the insects often move more slowly, but the lighting will often be more favorable as well.
Insect photography is a very specialized field, but it is also one that often results in stunning, otherworldly images. Another benefit is that insects are everywhere, so you don’t have to search long for an interesting subject — and they don’t require a model release!
About Author
Jim Rosele
Jim Rosele writes for Rose Pest Control a company that specializes in Arlington Heights pest control. When he’s not working, he loves getting outside and shooting as much as he can!

Great tips! I always seem to catch insects in bride’s bouquet! I have a fantastic 100mm lens and will keep these tips in mind! Thanks!