Tips for Photographing the Aurora Borealis
An aurora is a natural phenomenon where the night sky is colored with lights. It is drawn to the magnetic poles of the earth and usually occurs in the high latitudes of the Arctic and Antarctic. The Aurora Borealis, also known as the Northern Lights, is seen in most parts of Scandinavia. It draws visitors from all over the world, all of whom aspire to photograph this unique display. Here are some technical tips on how to take good photographs of the aurora.
Technical Skills for Aurora Photography:
This phenomenon occurs in the dark and though the light show seems bright, it is not as much in reality. Set the aperture of your camera lens as large as possible, which means a low f-stop number. Set its upper limit to f/2.8; anything lower is better. In this way, the lens will be able to capture the lights from the aurora. A large lens aperture reduces the required exposure time. This is good since shorter exposure will give a more realistic shape of the aurora. However, longer exposure captures colors better, especially those which we cannot see with the naked eye. Foreground details are also better captured with longer exposures, which give a scale reference for the huge aurora and also enhance the photograph’s visual appeal. An ideal exposure time of 40 seconds would strike the right balance.
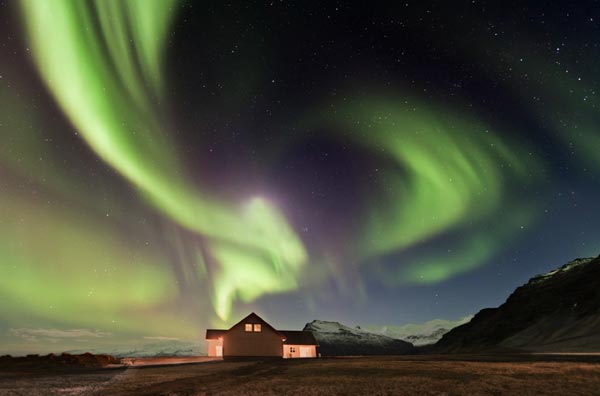
Martin Zalba
Zoom, Focus and Film Speed Settings for a Digicam:
Use a fairly wide-angle zoom lens, preferably fixed at 28 mm, to capture the large and distant aurora. Lens filters may work in other forms of photography, but since the aurora lights have irregular frequencies, filters will cause strange reflections and will spoil the natural beauty of the shot. If using a digital camera, set it to manual focus mode, the white balance to Auto and the noise reduction setting turned on. Choose a film setting of ISO400 or ISO800; faster settings tend to give grainy photographs but with a slower setting, you may not be able to capture the desired shot of the aurora before the display changes or disappears altogether.
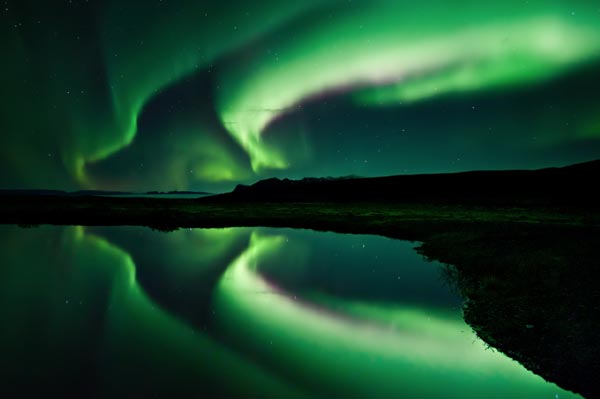
Raymo-Phot
General Preparation for the Photo-Shoot:
Technical know-how is not sufficient; a good photographer takes care of the practical aspects as well, especially of his surroundings. Select a location for your photography session that is within the auroral belt to increase the likelihood of catching a show. Also, stay far away from cities and airports to avoid their bright lights and polluted air. A tripod with a remote wireless trigger is essential, so that you don’t need to touch the camera and it can remain absolutely steady. Make sure the tripod is firmly set into the ground and get the strap off the camera, so that it stays balanced even in strong winds. Come prepared with supplies. Batteries run out quickly in cold climate, so bring sufficient spares. Since it will be dark, a torch will be handy to check various settings on the camera and to change batteries. Use a stop-watch to time exposures, for precision. The aurora display can take several hours to make an appearance, Wear lots of warm clothing and carry a hot drink. And while you wait, you can experiment with various camera settings. Your patience and preparation will eventually be rewarded.
About Author
Photopoly.net
This post is published by a Photopoly.net editorial team.


Extremely good article! I’m a usual website visitor to your website. Keep up the fantastic work, I read few articles on this internet site and I believe that your weblog is very interesting and contains lots of great information.