Tips to Achieve Perfect Portrait Posing
The very specialized area of portraiture or portrait photography should not only capture the look of the person or group of people being photographed, but capture their personalities, too. While portraits generally focus on the faces of the subjects, including the body and some background can further enhance the mood you are seeking to create in your picture. There are basically four types of portrait photography: constructionist, environmental, creative and candid. The most common type of portrait posing is constructionist, where a person or group is posed in a formal setting or studio to evoke a certain look. This has been used for decades to create the typical family portrait pose so often used on holiday cards. The environmental portrait will feature a subject within a relevant context. For example, a golfer playing golf, or a doctor in a hospital. Creative portraits are created with the use digital techniques that alter and enhance the photographs, while candid portraits capture subjects in natural poses, since they are generally unaware that they are being photographed. In the past few decades, candid portraits have become big business as paparazzi around the world seek to capture pictures of celebrities, when they are least expecting to be photographed. In order to achieve the most professional portrait photographs and minimize your post-processing workload, you can follow these steps to achieve perfect portrait posing.
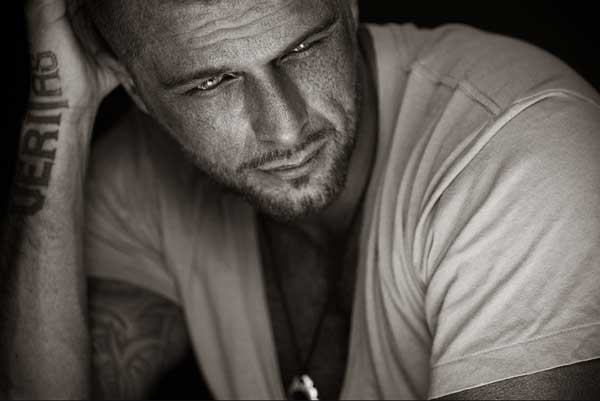
Veritas by Stefan Beutler
Step 1 – Making Your Model Comfortable
It takes patience and practice to capture your subject’s personality. The more relaxed the subject is, the easier it will be to capture her unique spirit and essence in your portrait posing, as tension lines and false grimaces are replaced by natural smiles that light up the eyes. The perfect portrait pose will differ, dependent upon what your client wants to achieve with the resulting portrait. It is essential for you to talk to the client both before the shoot and on the day of the portrait posing shoot to prepare and get to know each other. Try to build a friendly rapport that will ensure that your subject is as relaxed as possible. Playing their favorite type of music will also help relax the atmosphere on the day of the actual portrait posing shoot.
Step 2 – Standing or Sitting?
If the portrait is to be three-quarter or full body, your portrait posing preparation must consider whether the subject will stand or sit, the background they will pose in front of and what type of seating will be used. It is also important to consider clothing at this point. For example, an elegant formal gown will not be shown off to its best advantage, if the subject is seated. When standing, the subject will appear slimmest and get the most pleasing effect if her hips are at a slight angle to the camera. This is achieved by portrait posing the subject, so that she stands with her front foot slightly in front of her back foot and pointed towards the camera, and her back foot turned at a 90-degree angle to the camera. If you are going to do standing and sitting portrait posing at the same shoot and in the same clothing, take the standing shots first, so that creases in clothing, formed when sitting, do not cause problems.
Step 3 – Handling Hands
Hands are an important portrait posing consideration, yet, they can be the most overlooked. Hands can convey great emotion and expression, and are, for most people, important in their verbal and physical communications with others. Hands can also be a sign of age and status, as wrinkles, blemishes, finger nails and dry skin give tell-tale information about the subject. While you may want to feature a well-manicured hand resting gently under your subject’s chin, you may also want to ensure that unsightly hands are out of shot. Try to have the hands serve a purpose in the picture, such as holding a book, framing the face or directing attention. In standing shots the arms and hands should be left to fall naturally, while in sitting shots the hands should be together in front of the subject at waist level or higher, if they are to feature in the shot.
Step 4 – Facing the Truth
Camera angle is particularly important when portrait posing your subject. A double chin and loose jowls can be accentuated to disastrous effect if the camera angle is too low and the subject has to bend her head downwards. An elegant neckline is best achieved by having the subject tilt her head slightly backwards to look up at the lens or slightly to the side. A more candid shot can be achieved by portrait posing the subject so that her attention is focused on something outside the camera’s field of view.
Step 5 – Illuminating the Face
Lighting is key to portrait posing. Having your subject face towards a natural lighting source, either outdoors or from a window, will give the most natural looks, but to achieve very controlled results, many professionals commonly use parabolic lights and a classic portrait posing lighting technique such as paramount lighting. Also known as butterfly lighting, this technique is particularly popular when portrait posing models, since it produces a symmetrical, butterfly-like shadow beneath the nose and emphasizes good skin and high cheekbones. The lights are placed close to the subject with the key light placed high and the fill light directly under it, and adjusted until the perfect butterfly effect is achieved.
The digital age makes it possible for photographers to take multiple photos quickly and cost-effectively. This allows today’s photographers to experiment and play around with poses and techniques to ensure that they capture portraits that their subjects will love.
About Author
NelJane P
NelJane P is a professional photographer and she loves to write about photography.


