Understanding Miniature Tilt-Shift Photography
Tilt-Shift photography refers to a technique through which the photographer uses camera movements or tilts for selective focus to simulate a miniature scene in an image. Tilt, in photography, refers to the rotation of the lens plane relatively to the image plane and it is used to control the orientation of the plane of focus, which means you can use it to choose what part of the image will appear sharp. Shift, in photography, refers to the movement of the lens in parallel to the image plane and it is used to adjust the position of the subject in the image, without moving the camera. The use of shift is especially useful when photographing a tall subject, for example a building.
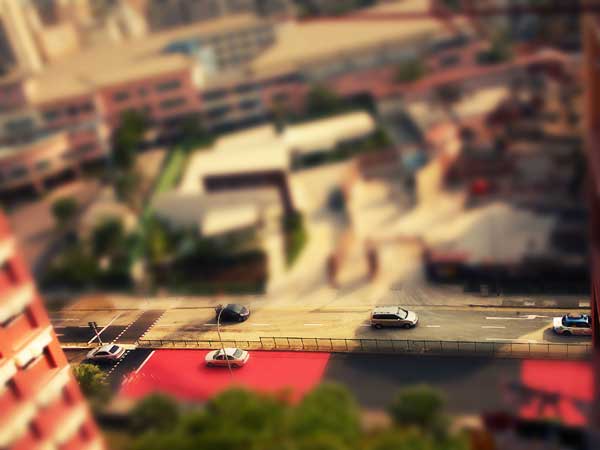
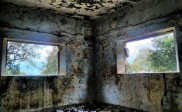
Tilt Shift by SS-OschaWolf
By using the technique of tilt-shift in photography, you can create the impression of a miniature scale model from a real life scenery. By combining different techniques, like shooting from a high position and using selective blur in a part of the image, you can create a fake impression of miniature in a photograph.
How does tilt-shift photography work?
There are basically two ways to achieve the effect of tilt-shift in photography. One is to actually use special lenses designed for tilt-shift photography. A lens of this type will give you a very precise control over the depth of field in a photograph, allowing you to make selective focusing in an easier way than with a normal lens. By using a tilt-shift lens you can easily blur a large part of your image while keeping a selective focus to only a small part that resembles a narrow band. This will create a very interesting effect in a photograph, and because it distorts a part of the image it will give the impression that the sharp objects are actually smaller than reality.
Tilt-shift lenses are suited for this type of effect, because they change the perspective of the image. For example, using a tilt lens will make the lines from an image taken from a high perspective remain parallel while with normal lenses these would have eventually converged. These lenses are not only useful to create the miniature effect in a normal image, but they are also used to capture architectural images of tall buildings, which when taken with normal lenses will have perspective distortions that might give the impression of a building falling. In this case, tilt lenses will eliminate that effect.
The other way to achieve the same effect, without special lenses is to simulate the shallow depth of field in Photoshop or in another image editing software. The images should also be taken from a high perspective to keep the feel of small objects. Just like in the case of tilt-shift you should leave an area of the image in focus, an area resembling a narrow band. The rest of the image should be artificially blurred to create the same impression of miniature. Although the results might not be as good as photos produced by special lenses, this might be a good start for those who don’t have the dedicated gear for miniature tilt-shift photography.
Gear for tilt-shift photography:
Any SLR camera will be good for this type of photography but the tilt-shift lenses are the most important part of the gear. These lenses are very expensive, especially from manufacturers like Canon and Nikon. But, there are also cheaper alternatives. For example, Lensbaby manufactures tilt-shift lenses at a lower price with adapters that can be used with normal lenses and they work with cameras from Nikon and Canon among others. The drawback of tilt-shift lenses is that there are not yet any auto-focus shift lenses. So, you will have to use manual focus when using these lenses.
How to create the miniature effect?
Miniature scenes are interesting to photograph, but what about turning a real life scene into a miniature one? Of course you can’t actually transform the scene but you can create the impression of a miniature using the effect provided by tilt-shift lenses, or with the help of Photoshop or a similar program.
Using software, like Photoshop, allows you to create effects similar to those produced by tilt-shift lenses in the post processing stage. After you have taken the photograph, you can use the software to choose which area of the image you want to be sharp and which to be in blur. This gives you a great flexibility because you can experiment and choose different regions in your image and find the one that works best for the miniature effect.
Most of the fake-miniature images you can find on the Internet are actually taken with normal lenses and post-processed in Photoshop or in a similar program. Still, there are some guidelines you should be aware of in order to get great results when trying the miniature effect in the post processing stage.
First of all, you should have images that are taken from a high position. This will allow you to create the impression of miniature more easily, especially if your image includes buildings and streets.
To make a full size natural scene resemble a miniature scale model you must keep the center in focus and blur the bottom and the top parts of the image, just like a normal image of a miniature subject would look like when using a shallow depth of field. Because the same shallow depth of field is not really possible with a full size scene, the blur you apply in post processing should resemble the blur that lenses with a very wide aperture would create in a normal miniature scene.
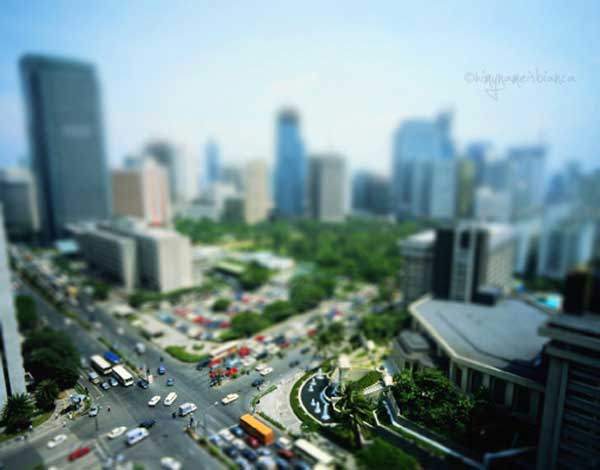
Tilt shift by himynameisbianca
Photoshop has a great tool for blurring an image: the Lens Blur filter. You can achieve with this a similar effect to the one created by the tilt-shift lens. Use sharpness gradients to blur the image gradually from the center to the edges, so that your photo has only a sharp narrow band in the middle. The rest of the image should get a graduated blur, just like it would happen if the photograph was taken with a normal lens and a wide aperture. This will create the impression that the blurred part of the image contains objects that are small in size.
Take into account that the simulation of a miniature scenery will seem more realistic if you choose subjects that have a low height, and most important, the angle of your shot should be high from the ground. If the scenery includes tall objects, like buildings, and the angle of the shot is low and close to the ground, then, miniaturizing the photo will be more difficult.
Another technique you can use to create the miniature effect is to increase the contrast of the image so that the shadows of the objects photographed will become darker. This will make the objects resemble more miniature models, because the shadows will look like they were created by artificial lighting.
The miniature effect is very interesting and it was applied in commercial photographs, in motion pictures as well as in music videos. Although the desired effect is not always easy to achieve, you can create some interesting pictures using this effect.
Below are some great examples of tilt-shift photography
Tilt-Shift by cheyrek
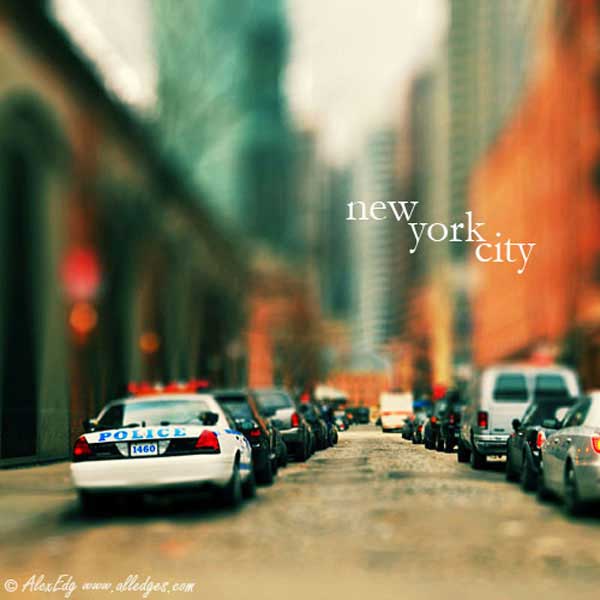
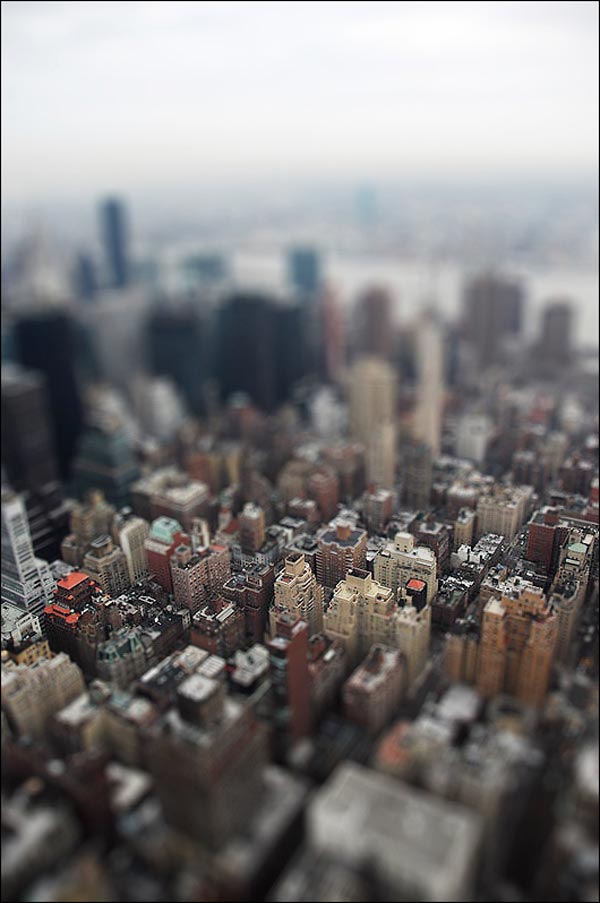
New York City – Tilt-Shift by AlexEdg
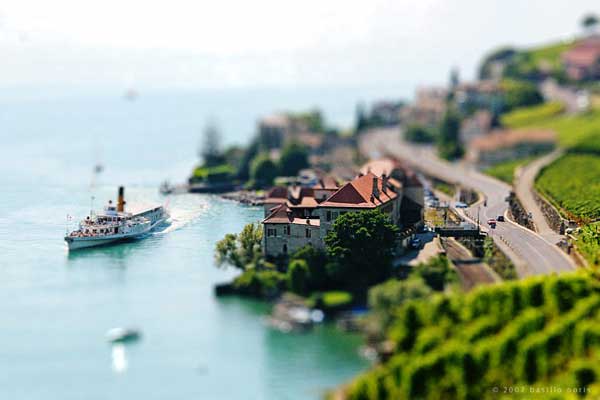
Tilt Shift I – St Saphorin by b4silio
tilt-shift by Echomrg

Tilt Shift – Dubai Mall by lostreality91
Stock Shift by Raineshine
BREST tilt shift 5by LOUSTIQUE

Tilt-Shift effect no.1by Tomi0011
About Author
Valentin Gavan
Valentin Gavan is a self-taught photographer who is passionate about photography. He also does concert photography for an online metal magazine. You can see some of his works via his profile

