Lomography: Create Fisheye Lomo style photos in Photoshop
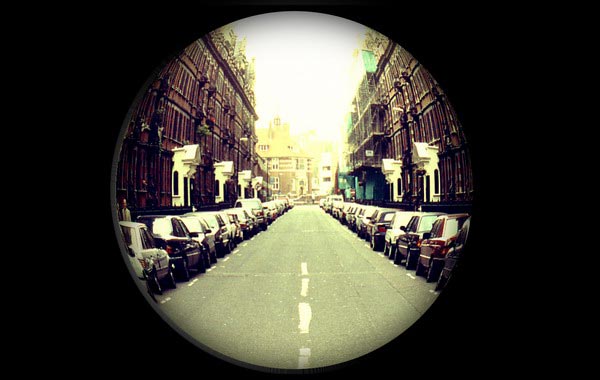
In this tutorial, we will create a Lomography style fisheye photo out of a normal shot. Lomographic photos are appreciated because of their beautiful color effects produced through different film processing techniques, such as cross processing and the use of expired film. Lomo photos are also usually taken with cheap plastic cameras which are full of defects. But all those imperfections are what make the charm of lomography. So, the first part of this tutorial will deal with converting a regular image into a photo with lomo like colors. In the second part, we will see how to make this photo look like as if it were taken with a fisheye lens, a circular fisheye lens to be more precise ( thus, the black edges around the photo).
Photoshop CS2 was used for this tutorial.
To download the photo used in the tutorial, click here.
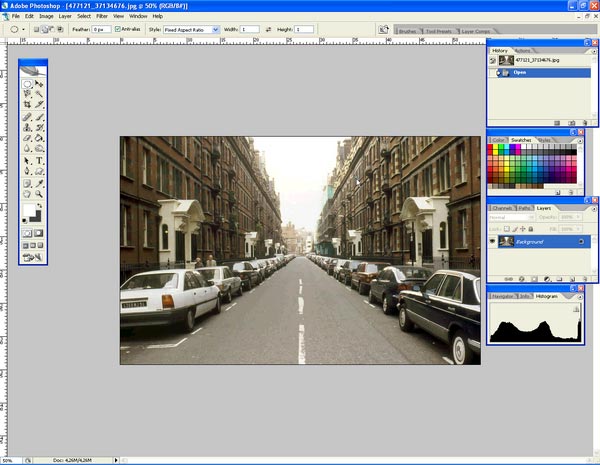
First, open your image in Photoshop.
Next, go to the layers tab and select channels. In the channels tab, select the red channel. This will make you see the photo in black and white. Now go to image > adjustments, and select Brightness/ Contrast and set the contrast to 40 and click on ok.
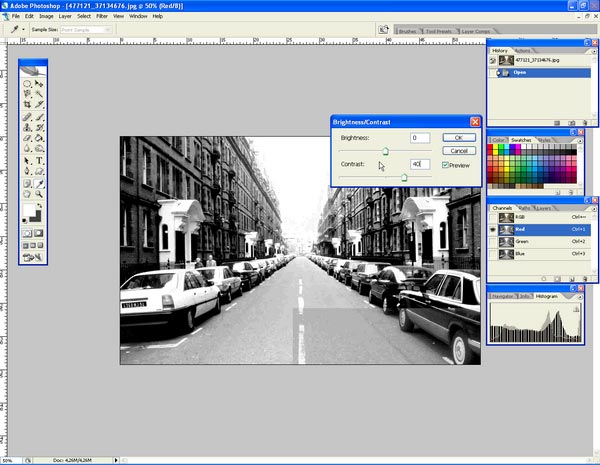
Now, select the green channel and redo the same thing, but set the contrast this time to 50.
Next select the RGB channel, and you will be able to see the lomo colors effect on your photo.
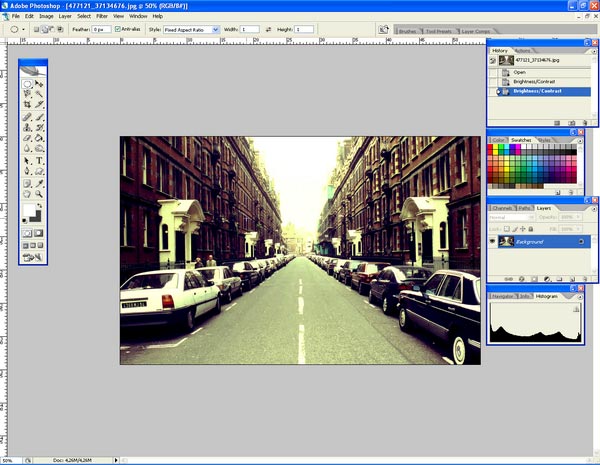
Now, that we finished working on the colors, we can move into achieving the fisheye effect.
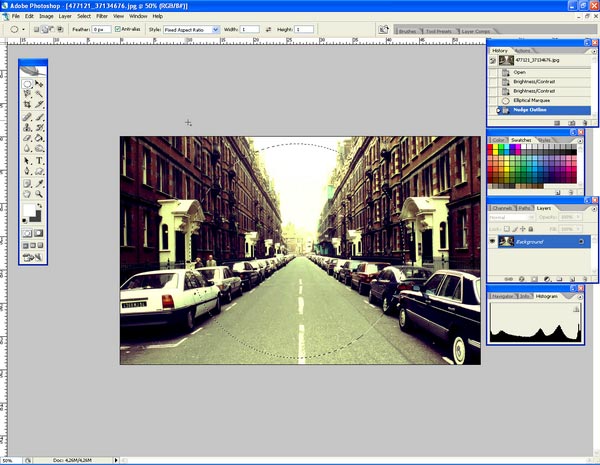
Grab the elliptical marquee tool from the tool box , and while holding the shift button down draw a circle selection around the area you want to turn into your final image.
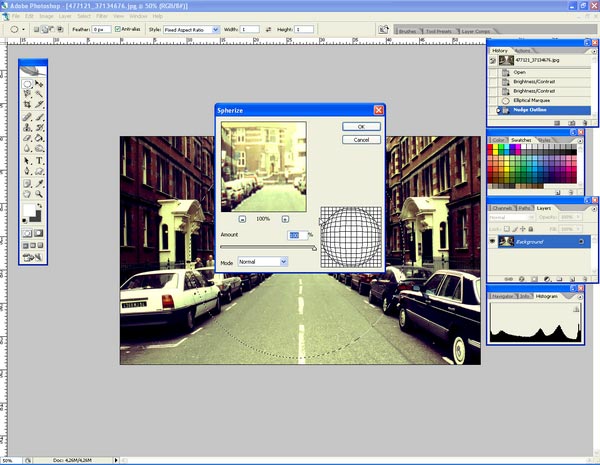
Now, go to filter > Distort > Spherize.
In the spherize window make sure the amount is set to 100% and hit OK.
You will be able to notice the fisheye effect directly after this stage. But, now we still have to work on making the rest of the photo black and adding some effects to make it look like it was shot with a cheap fisheye lens.
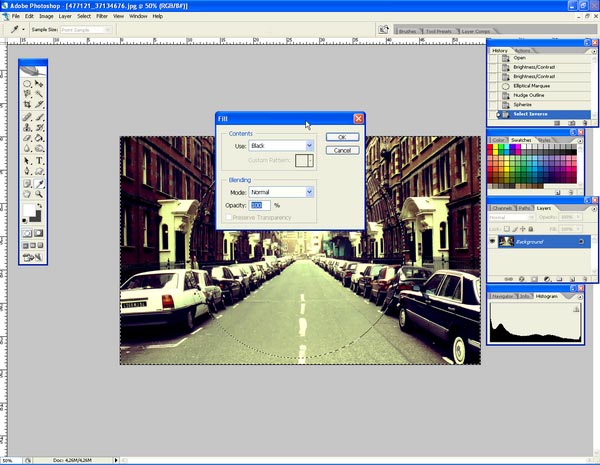
With your marquee tool still selected, right click on your image and click on select inverse. This will create a selection of everything but your fisheye sphere. Now go to Edit > Fill, and in the window that will open up, select black as the color and set the opacity to 100% and click OK.
The last action will create the black area around the photo. Now, all is left is to add some imperfections and to soften the edges of the circle a bit in order to make the photo more authentic.
Still with the marquee tool, right click on the photo and select layer via copy. A new layer will be created containing only the black area. Duplicate this layer, and then right click on the bottom one and select blending options.
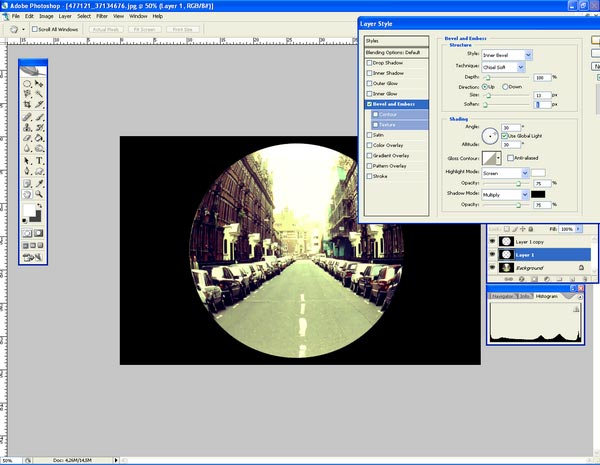
In the window that will open up select bevel and emboss and enter these values:
– Technique: chisel soft
-Size: 13
-Soften: 1
Leave everything else as it is.
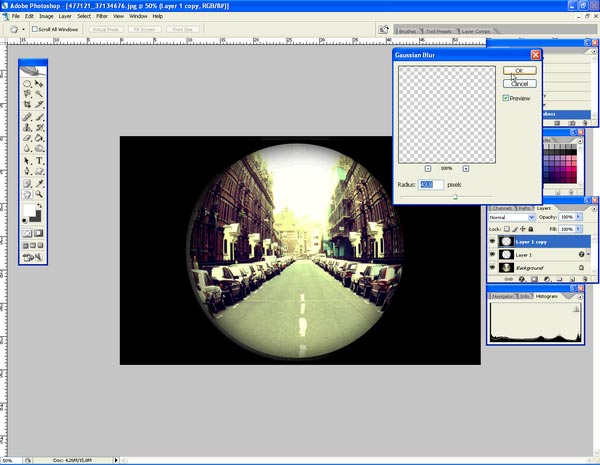
Now select the top layer and then go to Filter > Blur >Gaussian Blur and set the blur value to about 40. This will soften the circle edges and will create a little bit of vignette.
That’s it; you got your fisheye lomo style image. Just save your photo and try the effect on different images to see how they react.
Here is a video which you can watch and follow if you got lost at some point.
If you want us to know something about Lomography, drop us a comment.
About Author
Yassine Hakimi
Yassine Hakimi is a self taught Tunisian amateur photographer. He caught the photography virus back in 2006 and has been shooting and learning non-stop ever since.Feel free to visit his profile

Fantastic tutorial – love the look of the lomography style. Thank you for the great tips!
Nice tutorial. They also have filters such as Topaz that does lomo and you have full control over the settings.