A Beginner’s Guide to Astrophotography -part 2
Astrophotography is a type of photography that is aimed at recording images of the night sky and of astronomical objects. In the article “first part of the article”, we discussed how to take astrophotography images using only a camera and a tripod. In this second part of the article, we will discuss astrophotography with the help of a camera and a telescope. Using a telescope will provide you with a lot of more detailed objects to photograph, and you will also be able to photographs of deep space objects too that are invisible to the naked eye. This includes planets, dim stars that are hard to see with the naked eye, nebulae and galaxies.
Once you’ve tried astrophotography with a camera and a tripod, you’ll want to take it to the next level. Aside from the advantage a telescope gives you through the possibility of greater magnification, it also allows you to take photographs with longer exposure times. A longer exposure time will allow your camera to record more details but as we know from the first part, the movement of the Earth makes this very difficult. Photographs taken with an exposure time longer than 30 seconds to one minute are going to be very blurry so in order for this to work you need a way to compensate for the Earth’s rotation. The best way to do this is to use a telescope with an equatorial mount.
Telescope mounts. There are a couple of types of telescope mounts but you should know about two of the most used in astrophotography:
– The altazimuth mount is the cheapest and simplest mount but its disadvantage is its inability to follow astronomical objects in the night sky due to the Earth’s rotation on its axis.
– The equatorial mount is the most used mount for astrophotography because it can compensate for the Earth’s rotation and it can stay fixed on an object. Having a motor attached that automatically moves the mount at the same amount as the Earth’s rotation makes it perfect for astrophotography. One of the most popular equatorial mounts is the German equatorial mount which has a T-shape structure.
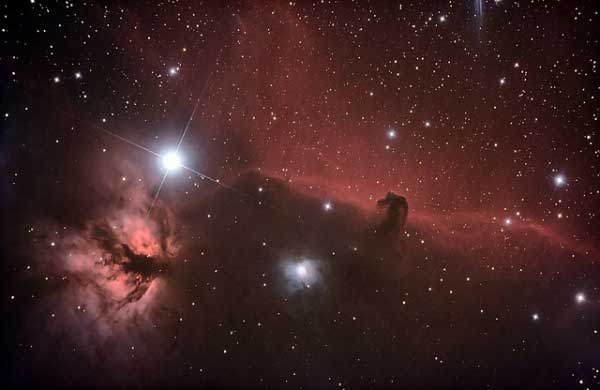
Photo by Xavier Ambs
How to use your camera with a telescope.
There are two more common ways which you can use a telescope for astrophotography:
– Piggyback photography, is the method through which you attach your camera on the telescope and you shoot through the camera’s lens, not through the telescope. This allows you to use the telescope as a platform and this basically offers you the possibility to take advantage of the equatorial mount which enables you to take those lovely long exposure photographs of an astronomical object. This technique is highly used because you don’t need expensive gear and the results can be great.
To achieve the best results you should take into account the recommended settings for shooting through your camera’s lens from the first part of the article. I should add that if you don’t have a remote shutter release, you should use the camera’s self timer to open the camera to exposures up to 30 seconds. For a longer time, you must use the bulb function and a remotely activated shutter release is mandatory.
– Shoot through the telescope. Taking beautiful wide field images of the night sky can be great but the real impressive astrophotography shots are taken through a telescope. The telescope’s focal length will allow you to photograph deep space objects by using the telescope’s lens instead of the cameras. You can connect a camera to a telescope by using a T-Mount that mounts to the camera and a 2” adaptor that screws onto the T-Mount on one side and into the telescope’s focuser on the other side. If your telescope doesn’t have a 2 inch focuser, as some have a 1.25” one, it will produce the effect of vignetting the image.
Connecting a camera to a telescope that has an equatorial mount will provide you with a powerful instrument to shoot the sky. Deep sky astrophotography will offer you some amazing photographs of stars, interstellar gas and colorful clouds but to achieve the best results you should take into account the following tips for shooting through a telescope.
Tips for astrophotography through a telescope:
– Find a good location for astrophotography with a dark sky and no light pollution if possible. This will give you the best results as the contrast between the dark sky and the stars will be better. You could try and shoot during the New Moon phase when the sky is darker.
– Make the right adjustments to tracking. Once you have found the celestial object you want to photograph, you should adjust the equatorial mount of your telescope to track the object so that it remains in the same position during the exposure time of your camera.
– Determine the correct exposure for your photos. As astrophotography usually means very long exposures, you should adjust the settings before you start shooting. One way to achieve this is to take a test photo and examine the histogram. Make the necessarily adjustments to the brightness and be careful with the noise levels. An underexposed photo usually has a lot of noise in its dark parts.
– Use a high ISO value that gives you good results (not too much noise). It usually is a value of 800 or 1600 for better cameras. Use a noise reduction setting if your camera has one.
– Check your focus. Focusing through a telescope is one of the most difficult parts of this type of photography. You should try and focus on the brightest star and check after a test shot on your screen, then make fine adjustments.
– Shutter speed. You’ll need to use long exposures (a couple of minutes or more depending of your shot) for a good photo and a remote controlled shutter release is necessary.
– Use a wide aperture. Try opening the aperture as much as you can for a better exposure of the image. Shoot in RAW. If you want to adjust your images after you take them, and you should, it’s best to shoot in the RAW format as it preserves the original data that comes from the camera’s sensor. It can then be more easily adjusted in an image editing program on a computer. This will allow you to better calibrate the image’s color balance, brightness and contrast.
– Take more photographs of the same image. One technique often used in astrophotography is to shoot more than one frame and to stack the images afterwards in order to obtain one higher quality photograph. Depending on the brightness of the sky and because of the thermal noise that appears in long exposure photographs, you should take more shots of a couple of minutes exposure time and then stack them in a photo editing software. You should experiment to find the best value for your exposure time.
Although a type of photography, astrophotography requires you to learn some things about astronomy too and if you want to get serious about it, then you’ll have to know a lot about the gear that’s being used such as the different types of telescopes, mounts and accessories. You’ll have to know how to locate celestial objects in the sky and you’ll encounter difficulties in finding the best locations for astrophotography, such as a place with dark sky and low light pollution. Although a difficult type of photography, once you get to know it, it will reward you with some great photographs that will make every effort worthwhile.
Below are some great examples of astrophotography:
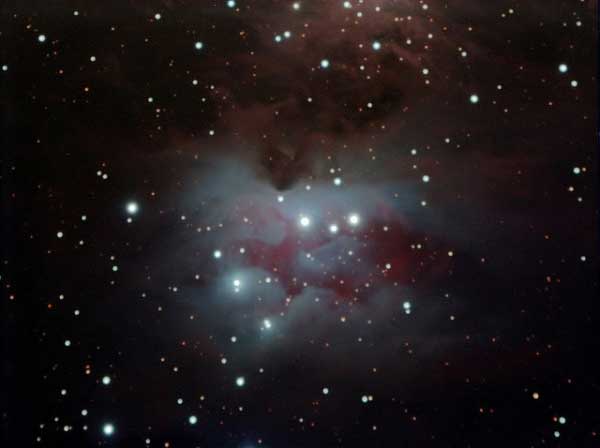
Photo By Chanctonbury
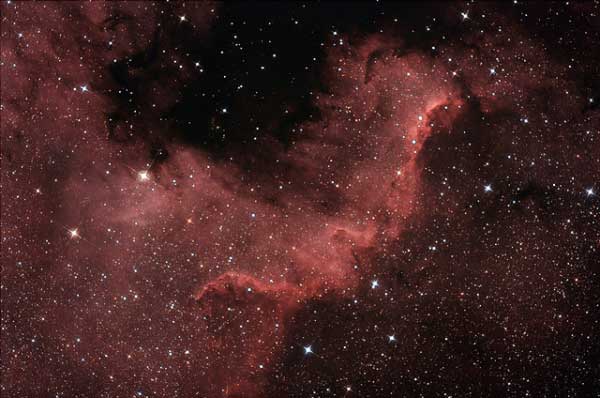
Photo By xavier amb

Photo By fabrizio farina
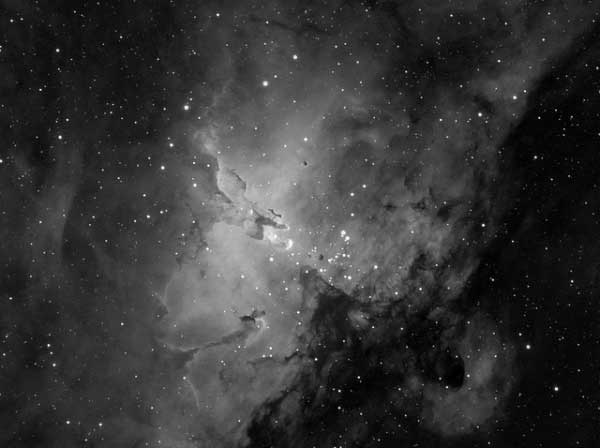
Photo By Francesco Navarra
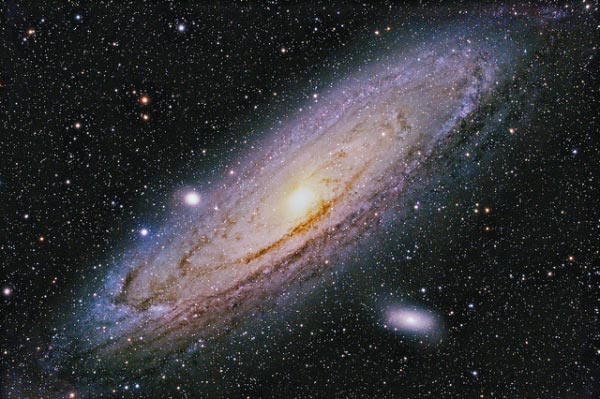
Photo By Terry Hancock
About Author
Valentin Gavan
Valentin Gavan is a self-taught photographer who is passionate about photography. He also does concert photography for an online metal magazine. You can see some of his works via his profile
