A Beginner’s Guide to High Speed Photography
The world is full of motion and moving objects. But, most of the time, those movements are too fast to be perceived by the human eye. Any moving object presents a multitude of possible photographs concealed by speed. High speed photography is the technique that allows us to discover and savor those fleeting moments which are impossible to be noticed by our eyes. This article will give you the basic information you need if you intend to delve into the magnificent world of high speed photography, a world where science and art are mixed to produce breathtaking pictures
Equipment:
– A camera: preferably a camera capable of long exposures and manual focusing. An SLR would be ideal, since it will allow you to control everything in your exposure and it will also allow you to use the kind of lens you need for your shot. If you are using a compact camera, it’s advisable not to use night scenery or fireworks modes to get long exposures. Because, although they give you the shutter speeds you need, they also control everything else including focusing.
– A flash unit: You will need a flash which can be set at different flash power values; because you will need really small flash bursts for the extremely fast action. You can use the speedlight flash units which go with your camera brand, for instance.
– A tripod: You will need a tripod to set your camera, and to assure there will be no shake with the long exposures. A remote controller can be useful as well for avoiding camera shake and for giving you more freedom to move around.
– Objects to photograph (water, milk, fruits, balloons, a pot, a spoon….) it’s all up to your imagination. (Take a look at the photos at the end of this article for inspiring examples)
High speed photography is used for scientific purposes but it is also used for creative reasons as it can give the photographer new areas to explore. But, the problem with high speed photography is how to get extremely short exposures with normal equipment.

Photo by byredis
Achieving extremely short exposures
The actions captured by high speed photography are so fast that the fastest camera shutter speed can’t freeze them. But there are some techniques that will allow you to capture such moments.
First you will need to take the photo in a totally dark room. This will enable you to use long exposures (5 to 10 seconds) and to use the flash to control the exposure time. As there will be no light entering the camera while the flash is off, the camera’s shutter speed won’t have anything to do with the exposure time and only the flash speed will determine it.
Reduce the flash power:
The less power the flash has, the shorter the flash burst duration will be. So, in order to get extremely fast exposure times you will have to decrease the flash power as much as possible. For example you will need to work with 1/16 power to get an exposure time less than 1/6000 seconds.
Triggering the flash:
With exposures this short you need to find effective ways to synchronize the flash with the action or movement you are shooting. For instance, if you are trying to capture the explosion of a balloon, you can use a sound trigger to launch your flash, these can be bought, or they can be built without having to spend too much money. You can find different ways to build one of those sound triggers on the internet. Here is an example.
If the action you are shooting does not emit any sound, you can try and build something which allows triggering the flash at the moment you want to capture.
Taking the photo:
Once you find a way to set up a system which permits for triggering the flash at the moment of action, you need to work on perfecting your shot. This part will deal with the photography side of High speed photography, so no more engineering stuff.
Focusing:
Auto focus is not suitable for this kind of photography. So, you will have to use manual focus. You also have to make sure everything you are photographing is within the focus range. For example, you will have water splashing in every direction when shooting an object falling into a pot full of water, and you need to get all of those water drops in focus. In order to achieve this, try to use small apertures (f/8 to f/16) which will give you a depth of field large enough to include everything. Also, when focusing, set your focus on the object closest to your foreground. If you are taking a photo of a drop of milk falling into a spoon, focus on the tip of the spoon.
Composition & Lighting:
Once you master the technical side of high speed photography, all is left is to work on getting creative ideas, composition and lighting, and you will be surprised by the astounding images you will get.
So, first consider perfecting your composition as much as possible. Think of what you want to convey through your photo and concentrate on that. And, don’t forget things like the rule of thirds, framing and getting rid of unwanted objects.
Also don’t forget to experiment with the angles of view. Don’t just take the easy road, try different points of view and then choose the one that suits the effect you are going for.
As for lighting, your only source of light will be your flash (es). Move you source of light around and try different settings until you are satisfied with the result. You can also use light modifiers, to bounce you flash to diffuse it, or to give it a color. Try using a light tent to diffuse the flash light when shooting reflective surfaces. And, if you are shooting glass and transparent objects, place your flash behind your subject and fire it through a translucent background.
Here are some great examples of high speed photography:
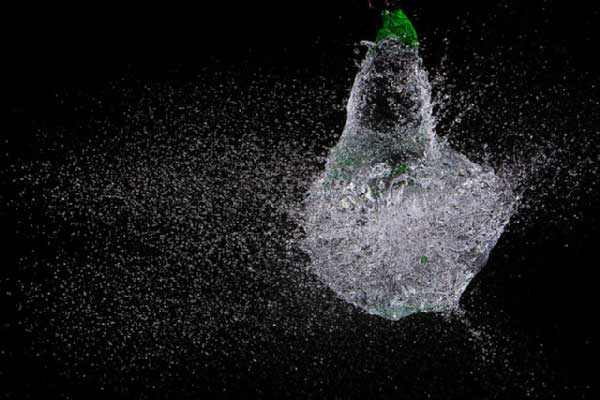
Photo by ttstam
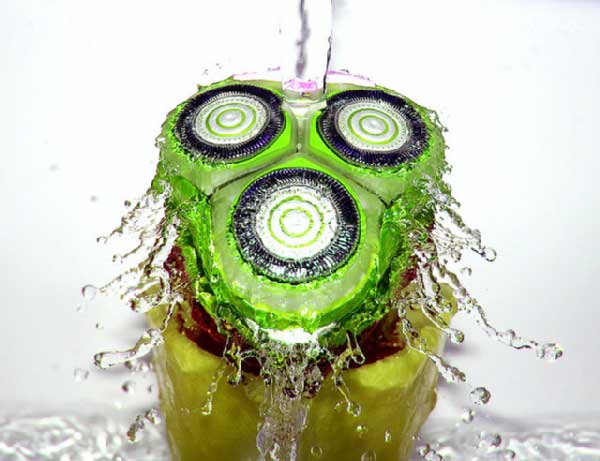
Photo by innoxiuss
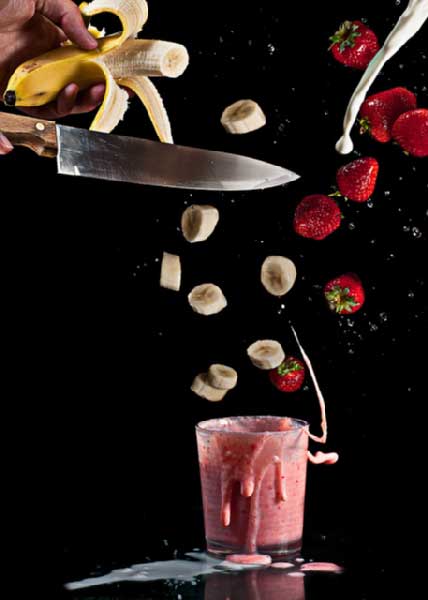
Photo by echo0101

Photo by AHMED
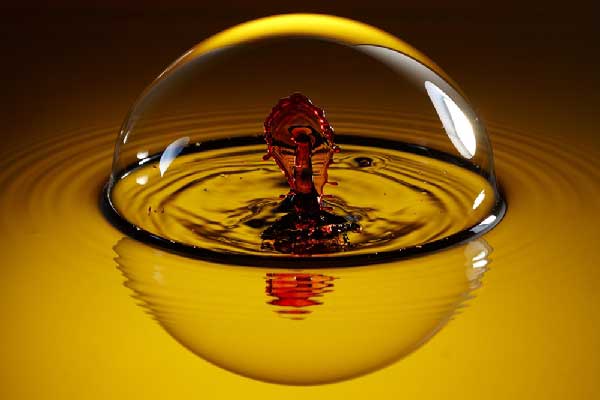
Photo by KevLewis
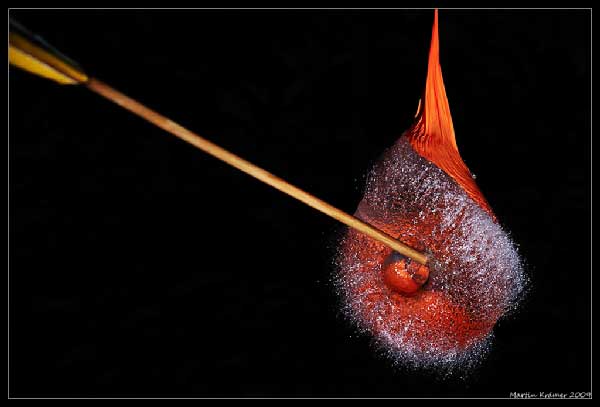
Photo by hquer
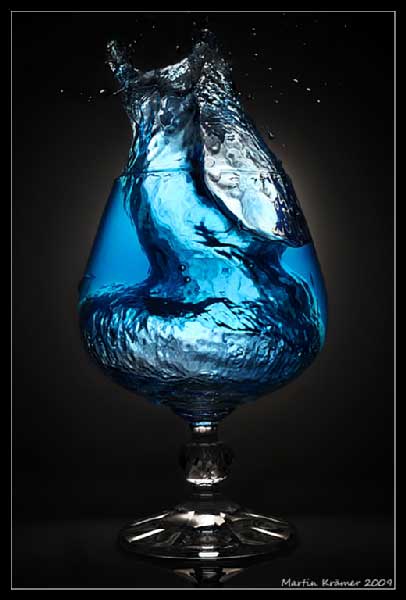
Photo by hquer

Photo by byredis
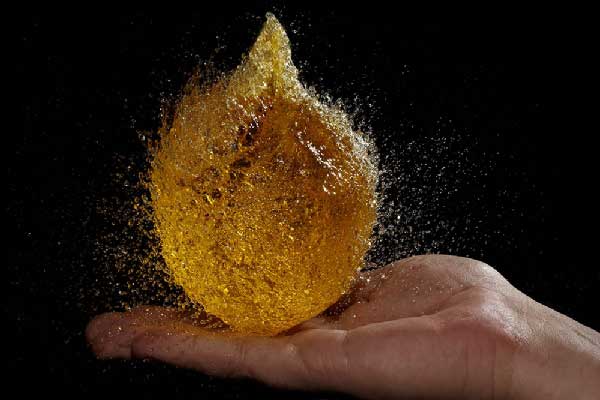
Photo by KevLewis
About Author
Yassine Hakimi
Yassine Hakimi is a self taught Tunisian amateur photographer. He caught the photography virus back in 2006 and has been shooting and learning non-stop ever since.Feel free to visit his profile
