Balancing Light – What Controls Exposure
Exposure control
If you want good pictures, you should have good exposures. A well exposed shot will technically create a good picture. Since light is the major determining factor in a photograph, how you control it will determine the output of your camera. Unless you want your pictures to be overly bright or strangely dark, a good exposure is a start to a good photography.
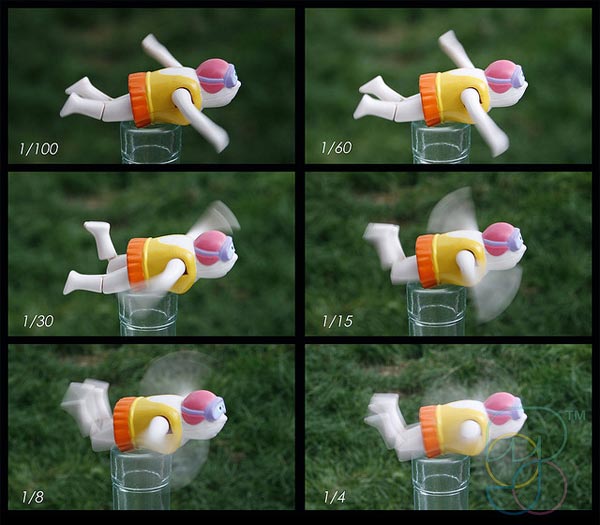
Photo by Mojo
There are three major factors that affect your camera’s exposure: Shutter Speed, Aperture and ISO.
Shutter Speed
To understand how the following factors interact, think of a bucket being filled with water through the faucet. When the bucket is full, you get the proper exposure. In this analogy, the length of time the faucet is open is like the shutter speed. If you can fill the bucket in 10 seconds, that’s the proper exposure. If a scene asks for a shutter speed of 1/100 and you used 1/500, that’s like closing the faucet while the bucket is still half-full.
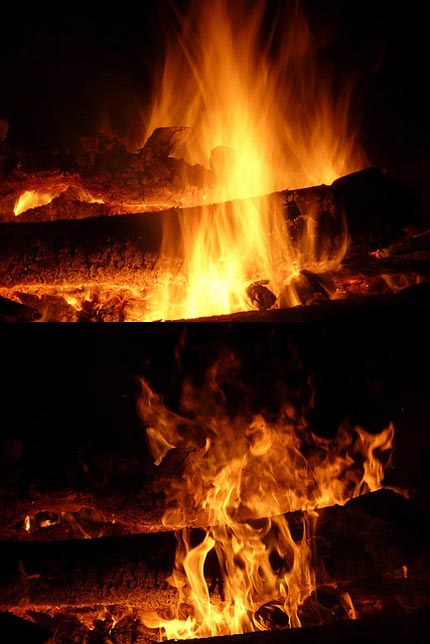
Photo by Gabriel Rocha
On the other hand, shutter speed only affects ambient light. Most of the time, it won’t affect studio lights, strobes, etc.
Aperture
The speed of the water flowing out of the faucet also determines how fast the bucket gets filled. The more the faucet is open, the faster the water flow which means the bucket gets full faster. The slower the water flows, the slower the bucket gets full. Aperture is the same. When you use an aperture of f/16, you are letting light to enter slowly since the opening is smaller. When you use an aperture of f/2.8, light gets in more since the opening is larger.
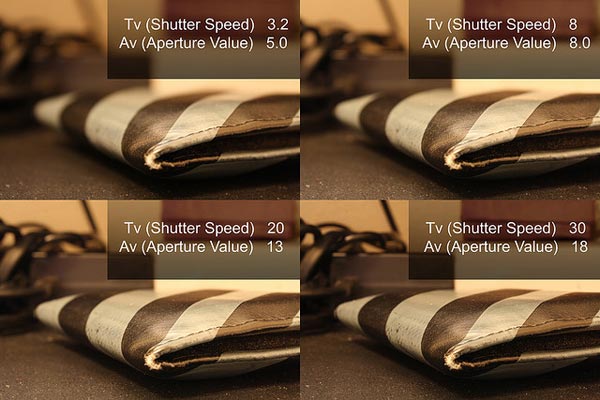
Photo by ThisKory
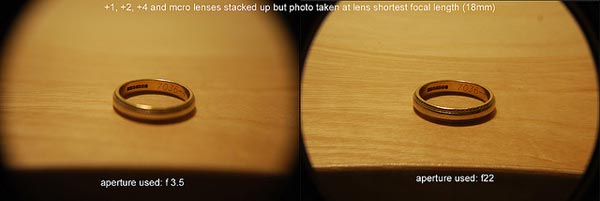
Photo by steven brannon
ISO
Bucket size also affects the time it takes to be full. The larger the bucket, the longer it takes and vice versa. In relation to ISO, the higher the value means you need less light for the sensor to capture. While a lower ISO value means you have to take more time or widen your aperture opening. Be wary though, having a high ISO capable camera doesn’t mean you should always use that value. When using a high ISO value, the camera sensor gets hot resulting into noise in data. This is why when using high ISO, your pictures get that grainy film effect which you may or may not appreciate.
Photo by Velo Steve
All in One
A scene that needs a setting of 1/500, f/4 and ISO 100 can be exposed in various ways. If you want more depth of field, you can use f/5.6 then a shutter speed of 1/250 and an ISO of 100. The change from f/4 to f/5.6 is one whole stop. A stop is doubled half the light you had before. Since you added the light by increasing the aperture to f/5.6, a slower shutter of 1/250 is compensated by doubling the light again. It’s the same for ISO too. ISO 100 to ISO 200 means one stop or double the light. You can use 1/1000, f/4 then ISO 200 and you will get the same exposure.
Mixing those three together can be confusing at first. Personally when I’m shooting, I try to use the lowest aperture first. This makes possible the use of faster shutter speed which means no more blurry shots. A shot that is not sharp is better than a blurry picture in my opinion.
With that in mind, I shoot in Aperture Priority mode most of the time. Do not hesitate to use the modes in your camera. Those we’re made for a reason. And there is no point in using manual mode if you waste them just fiddling with the settings. The light will always keep on changing.
But don’t worry if you don’t get all these technicalities at once. Most photographers get stuck in technicalities and they let it control them. This hinders creativity which is the most important part in photography. So don’t cringe if your exposure is off by a third stop, that won’t ruin your picture. Just keep on shooting and embrace the light!
About Author
Bernard
Bernard likes to surf the web, eat and read. He's been using his camera for 3 years already. And is on his way to capturing the light. Feel free to visit his website to see more of his works

