Tips for Urban Decay Photography
Sometimes the traces left by time on objects and places can prove to be astounding photographic subjects.
This effect of time is best seen in urban decay photography. This photographic practice concentrates on capturing the abandoned, ruined, degraded and out of use side of the urban space. Urban decay photography is closely related to Urban Exploration or Urbex which mainly consists of exploring and photographing places in the city that are inaccessible to the regular city dweller.
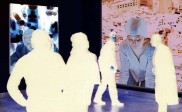
082010/1.jpg)
Urban decay photo by Yassine Hakimi
If you see beauty in chaos; if you appreciate the tones of rust and the texture of cracked walls, then you will enjoy urban decay photography.
Photographing urban decay is different from the other types of photography only by the subject it deals with and the challenges the topic may present. Other than that, it’s the same as any other kind of photography and the rules of composition and light still apply. Here are some tips that might help you in getting great urban decay photos.
Safety first:
082010/4.jpg)
Photo By Compound Eye
Photographing urban decay often involves getting into abandoned places, ruins, construction sites, etc. These places may present different dangers that you should be aware of. First of all, wear clothes which you don’t mind if they get dirty or torn. Also, don’t venture into a place without knowing on what you will be standing, as many of the abandoned buildings may present holes in the ground or broken stairs. If you are taking photos of a private building, consider asking for permission before entering. Bring your cell phone with you, and also consider bringing a friend along. Believe me, you will be glad you had company if faced with any trouble.
Gear Up.
In urban decay photography the equipment you are using will be reflected in the photos you will get. As you will be taking photos in places that can be very dark, a digital SLR will work best for you. However, you can always get great results with a compact camera. But an SLR will provide you with more control over the shot, allowing you more space to experiment with different techniques. Also, you will need a sturdy tripod for long exposures and flashlight that will help you find your way in dark buildings and will also provide you with a source of light in some instances. As for lenses, it is better to have both a wide angle and a telephoto lens. The wide angle lens will enable you to capture cityscapes, panoramas and huge objects from a near distance. The telephoto lens will offer you the possibility of capturing details, textures of objects that you can’t have access to easily.
The early bird catches the worm.
082010/2.jpg)
Urban decay by country_boy_shane
Getting up early will be beneficial on two levels. You will have the chance to get your photos while the streets and buildings are still empty which will put an emphasis on the decay effect of the photos. Also, early morning will give you great light for photography. The best time to get wonderful natural lighting of your subject is around sunrise and around sunset.
Go back at different times of the day.
You woke up early and you got the chance to breathe some fresh early morning air and to get some cool shots. Now, go back to the same spot at a different time. You never know what might change. The light will be hitting your subject differently which can produce a totally different look of the scene. You might find a new angle of view that is more interesting than what you captured before. Also, try to get some night shots of the scene. You will be surprised how many different photos you can get from the same spot.
Get the composition right.
082010/6.jpg)
Photo By SnaPsi Сталкер
Photography is all about composition and light. No matter what your subject is, a great composition draws the viewer’s attention from far away. Whether you are taking photos of a staircase in an abandoned building or a flower in field, if you don’t get your composition right nobody will be interested in looking at your photograph. Thus, when taking urban decay photos, take in consideration composition rules such as the rule of thirds, framing and simplification. The places where urban decay photos are shot are usually messy and full of things that may distract the eye. Try to find a main object and focus your composition on it. Try different point of views in order to find the angle that will allow you to exclude any distracting elements from your composition.
Observe and pay close attention to details.
082010/3.jpg)
Photo By Yassine Hakimi
Sometimes, a tiny detail will make all the difference between a dull scenery of urban decay and a photo that has meaning and which can be interpreted in different ways. So, look out for details that might help you add that spark to your photograph. Study the objects that you find and try to figure what they will mean to the viewer of the photo. For instance you can show the effects of time on a building by focusing on a dusty door knob or a window covered with spider webs.
Try some post processing techniques.
Your urban decay photography experience shouldn’t stop at the shooting stage. You should take advantage of the different techniques offered to you by the digital dark room. Post processing can give you the possibility of getting different effects out of a single shot.
You can, for instance, try HDR technique which will provide you with intense colors and stunning details. HDR ( High Dynamic Range) consists of taking several different exposures of the same scene and then to merge them into one single photo in an editing software, in order to get details in the highlights as well as in the shadow areas.
082010/5.jpg)
Photo By Compound Eye
You can also convert the photos to black and white to get more of a sinister and dark mood. Although, you can take the photos directly, in black and white, in the camera, my advice is to avoid that and to do the conversion in post processing. By converting the photos on your computer , you will have more control over the photo and on how each tone will be rendered in B&W and also you will always have a color version of the photo in case you didn’t like the B&W effect after all.
082010/7.jpg)
Photo By Yassine Hakimi
About Author
Yassine Hakimi
Yassine Hakimi is a self taught Tunisian amateur photographer. He caught the photography virus back in 2006 and has been shooting and learning non-stop ever since.Feel free to visit his profile


Great information thanks for getting this out there for people like me to read.
I like Your Article about Tips for Urban Decay Photography Perfect just what I was looking for! .